How to Enable Copilot in Windows 11 (Right Now)
Microsoft is rolling out the Copilot features with the Windows 11 23H2 update. It may take a couple of days to weeks for the rollout to complete. If you can’t wait to experience the AI magic on your Windows PC, we are there for you. You can easily install the Windows 11 23H2 update right now and use Microsoft Copilot.
Microsoft Copilot is an AI assistant feature that can help you with many tasks. It is embedded in Microsoft 365 apps such as Word, Excel, and PowerPoint to provide real-time assistance. In this guide, we’ll show you how to enable Copilot in Windows 11 without waiting for the next update.
Also Read: 6 Ways to Access ChatGPT for Free
How to Enable Copilot in Windows 11 [3 Methods]
Check out different ways to enable Copilot on your Windows 11 PC.
Method 1: Using the Settings App
If you have already received the Windows 11 2023 update but can’t seem to find the Copilot option, follow these steps:
1. Press Windows + I together to launch Settings.
2. Tap on Personalization from the left pane.
3. Click on Taskbar.

4. Enable Copilot (preview).
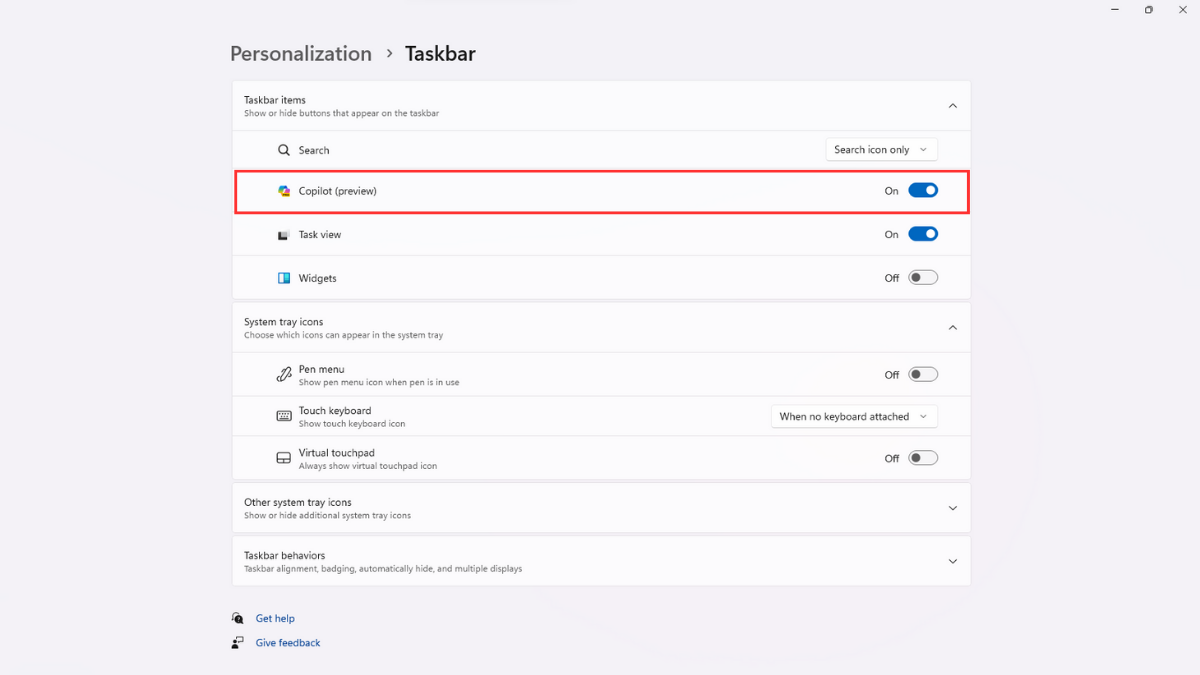
That’s how you can easily enable Copilot on Windows 11. This method will only work if you’ve received the Windows 11 2023 update. If you haven’t, try the next solution.
Method 2: Download Windows 11 23H2 Update
If you can’t wait for the Windows 11 23H2 update, you can install it right now by signing up for the Windows Insider programme. It allows Windows users to test new features before it gets released to the public.
1. Press Windows + I together to open Settings.
2. Click Windows Update from the left pane.
3. Tap on Windows Insider Programme.

4. Choose Release Preview.

5. Now, tap on Windows Update from the left pane.
6. Enable the Get the latest updates as soon as they’re available option.
7. Tap on Check for updates.
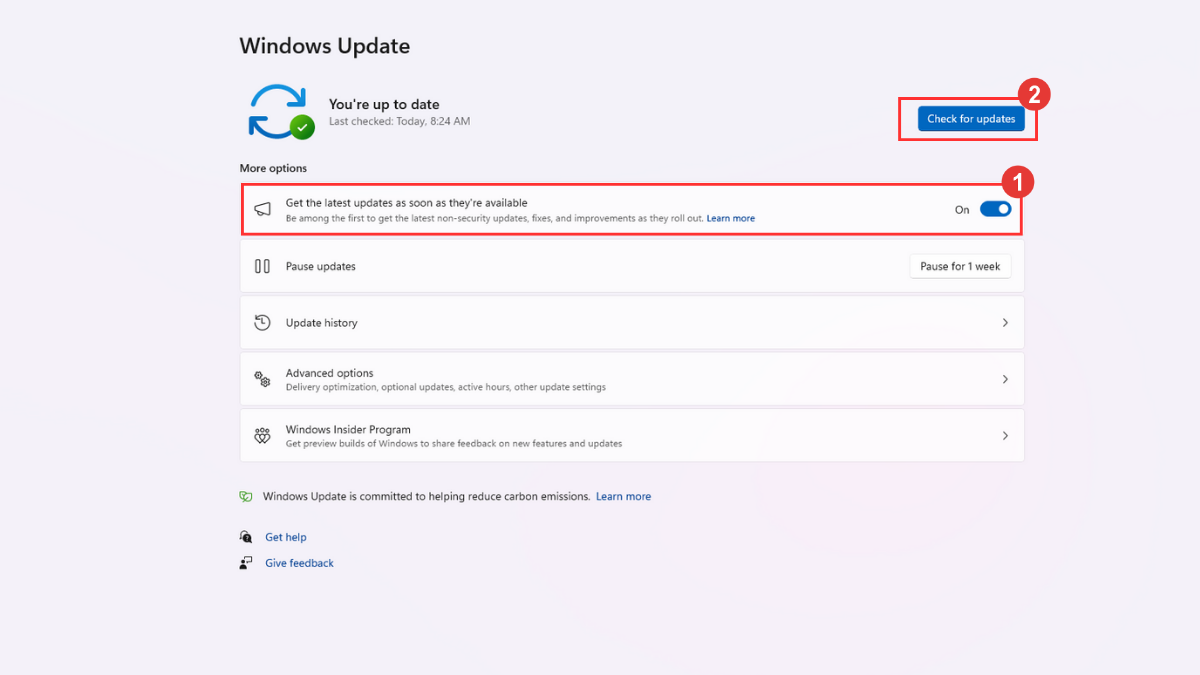
8. Download and install Windows 11, version 23H2 update.
9. Restart your computer.

If you don’t see the Copilot icon in the taskbar, use the method #1 from this article to enable it.
Method 3: Using ViveTool
1. Download ViveTool on your PC by clicking here.
2. Right-click on the downloaded file in File Explorer and click Extract all.

3. Click Extract.
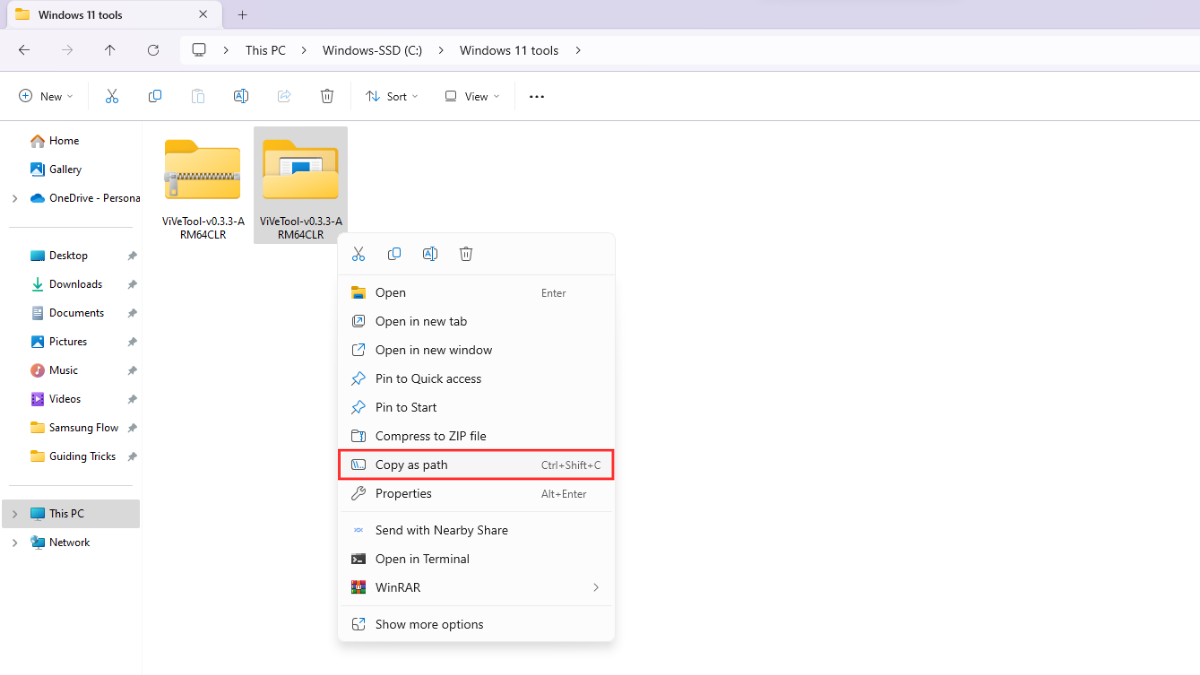
4. Right-click on the extracted folder and select Copy as path.
5. Type cmd in the Windows search, right-click on Command Prompt, and click Run as administrator.
6. In the Command Prompt, type cd, paste the path you copied in step 4, and hit Enter. It should look like this:
cd "C:\Downloads\ViVeTool-v0.3.3-ARM64CLR"
7. Run the following command:
vivetool /enable /id:44774629,44776738,44850061,42105254,41655236
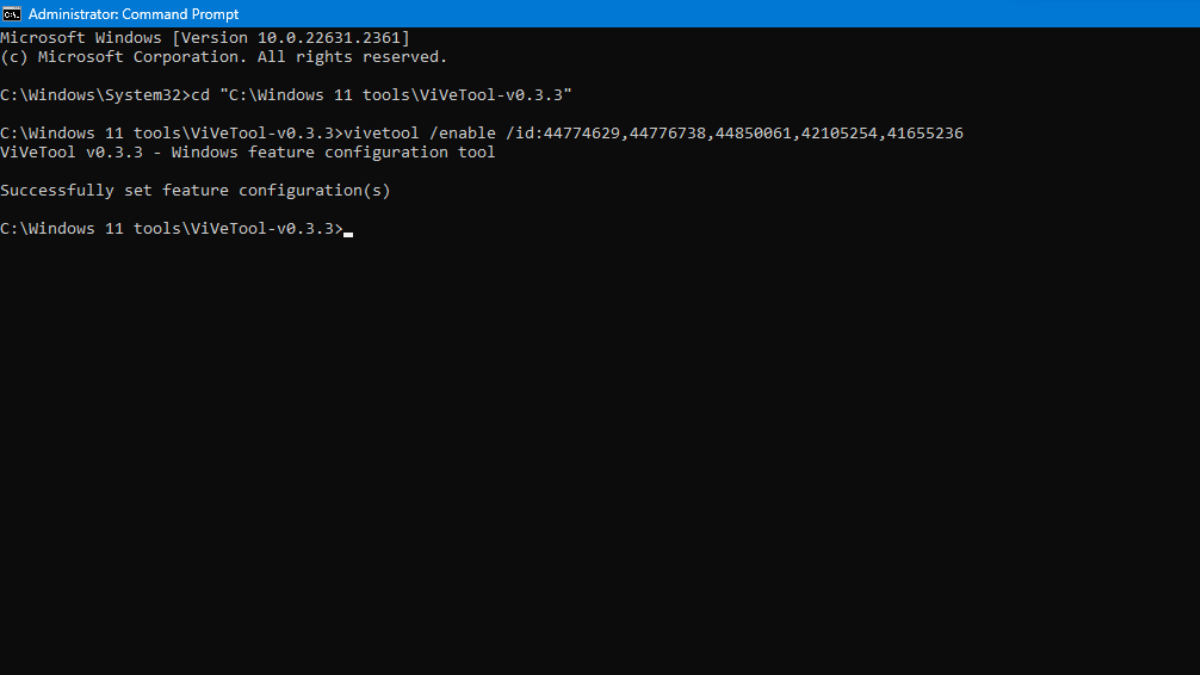
8. Close the Command Prompt and restart your PC. You will see the Copilot icon in the Taskbar.
So, that’s how you can enable Copilot in Windows 11 in different ways. If you have any questions, write them in the comments below.
Also Read:
1. How to Block YouTube Ads on Samsung Smart TV?
2. Instagram Account Suspended? Here’s What to Do


